Follow these steps to connect Filevine with Quilia by creating a Service Account and generating a Personal Access Token (PAT).
1. Access Filevine Advanced Settings
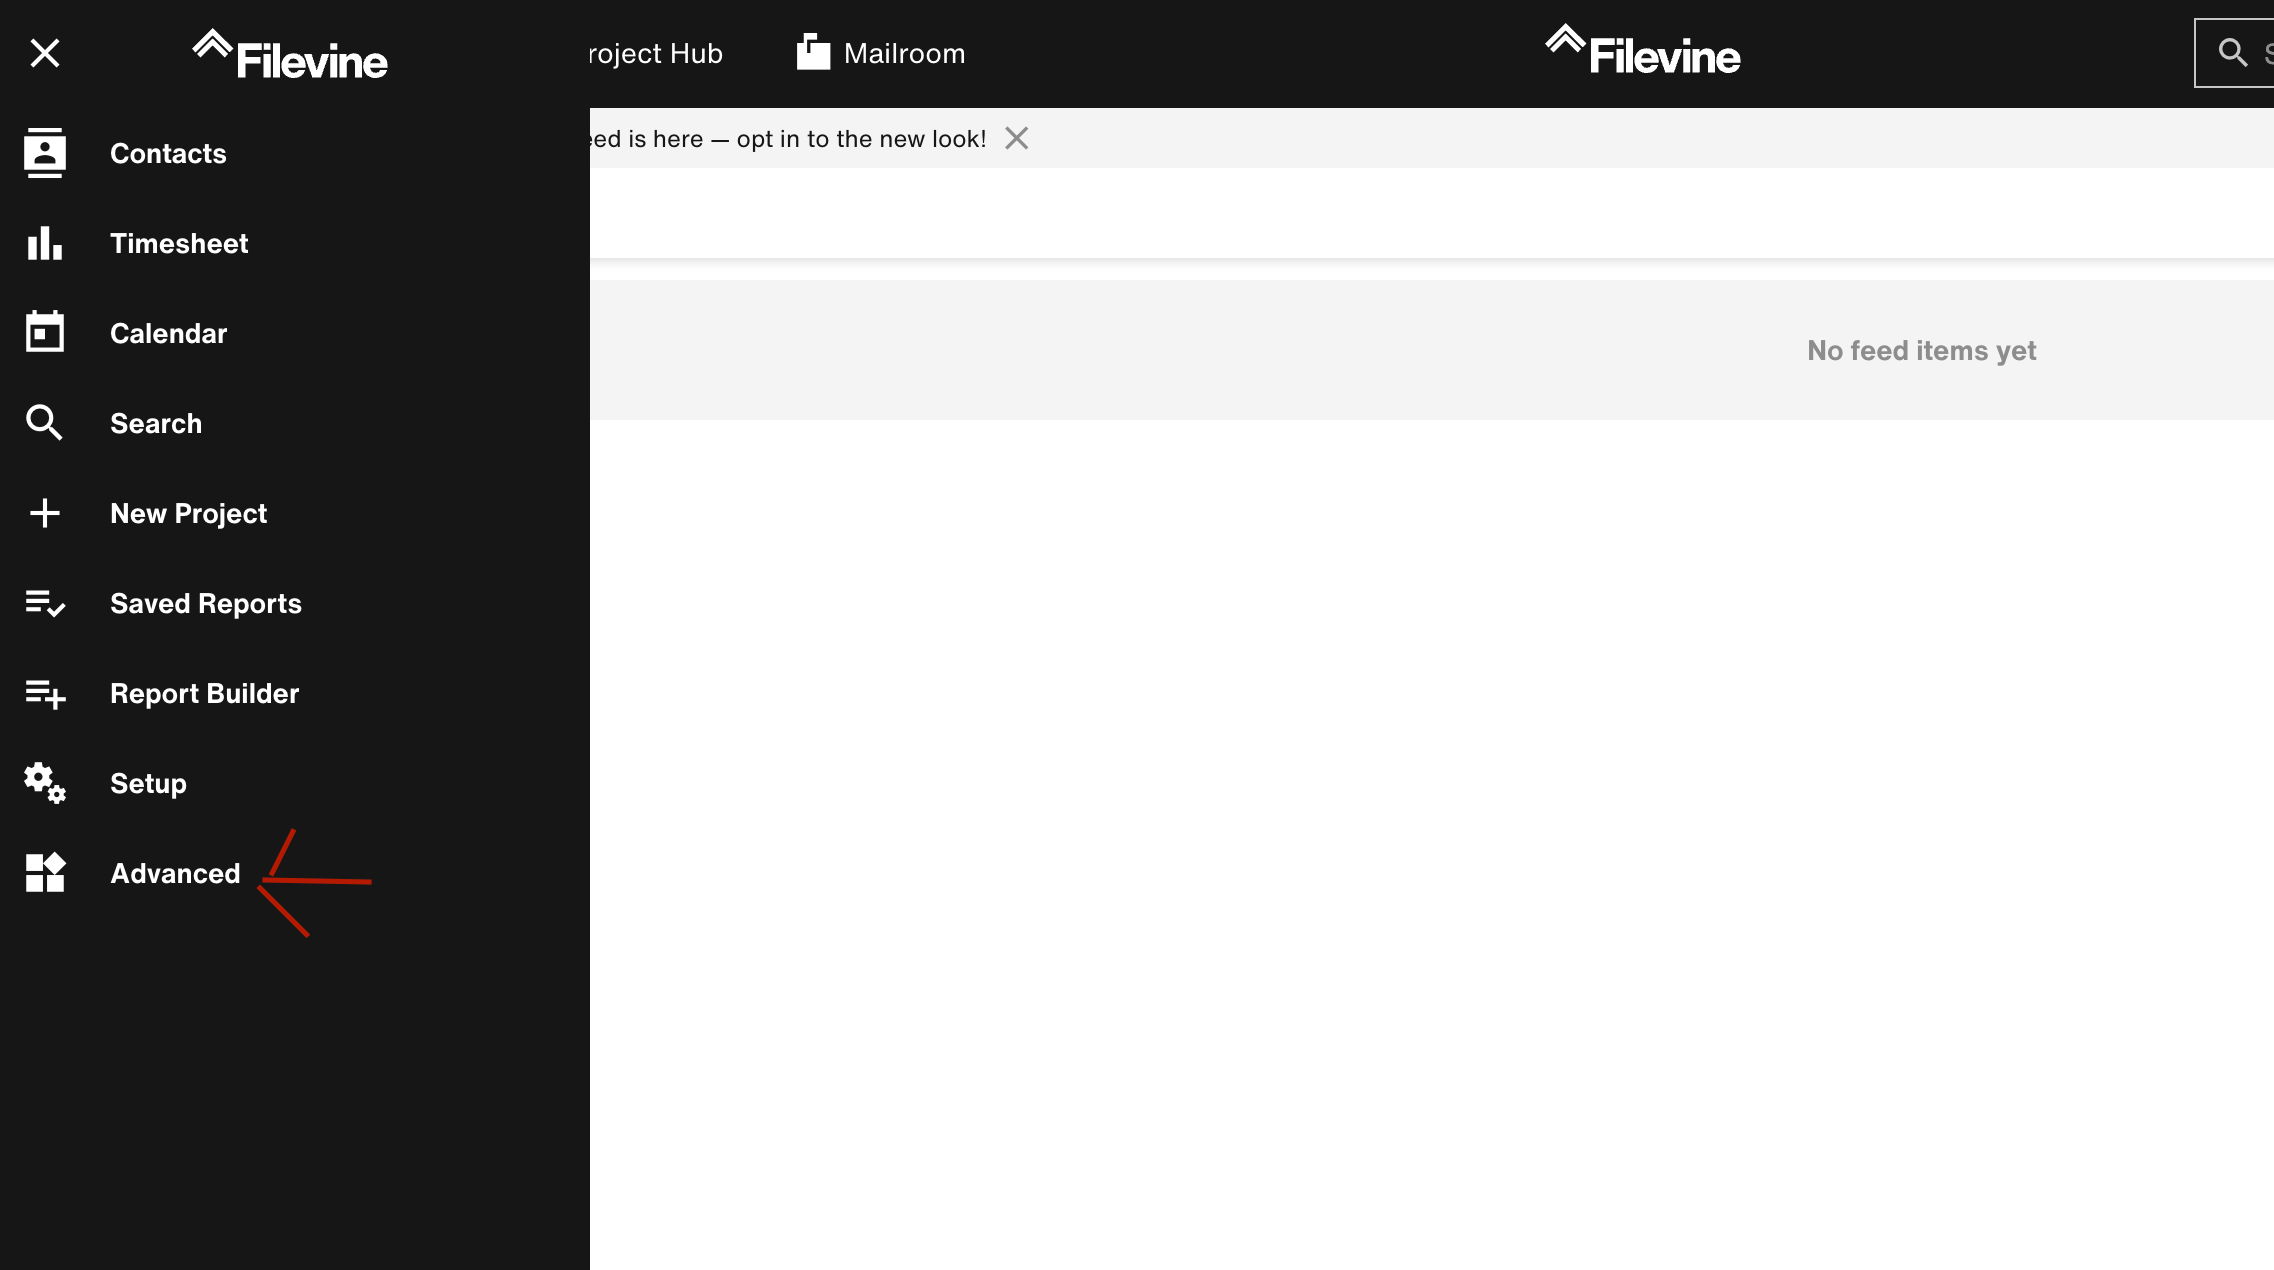
Click the hamburger icon in the top-left corner.
Select Advanced.
2. Create a New Service Account in Filevine
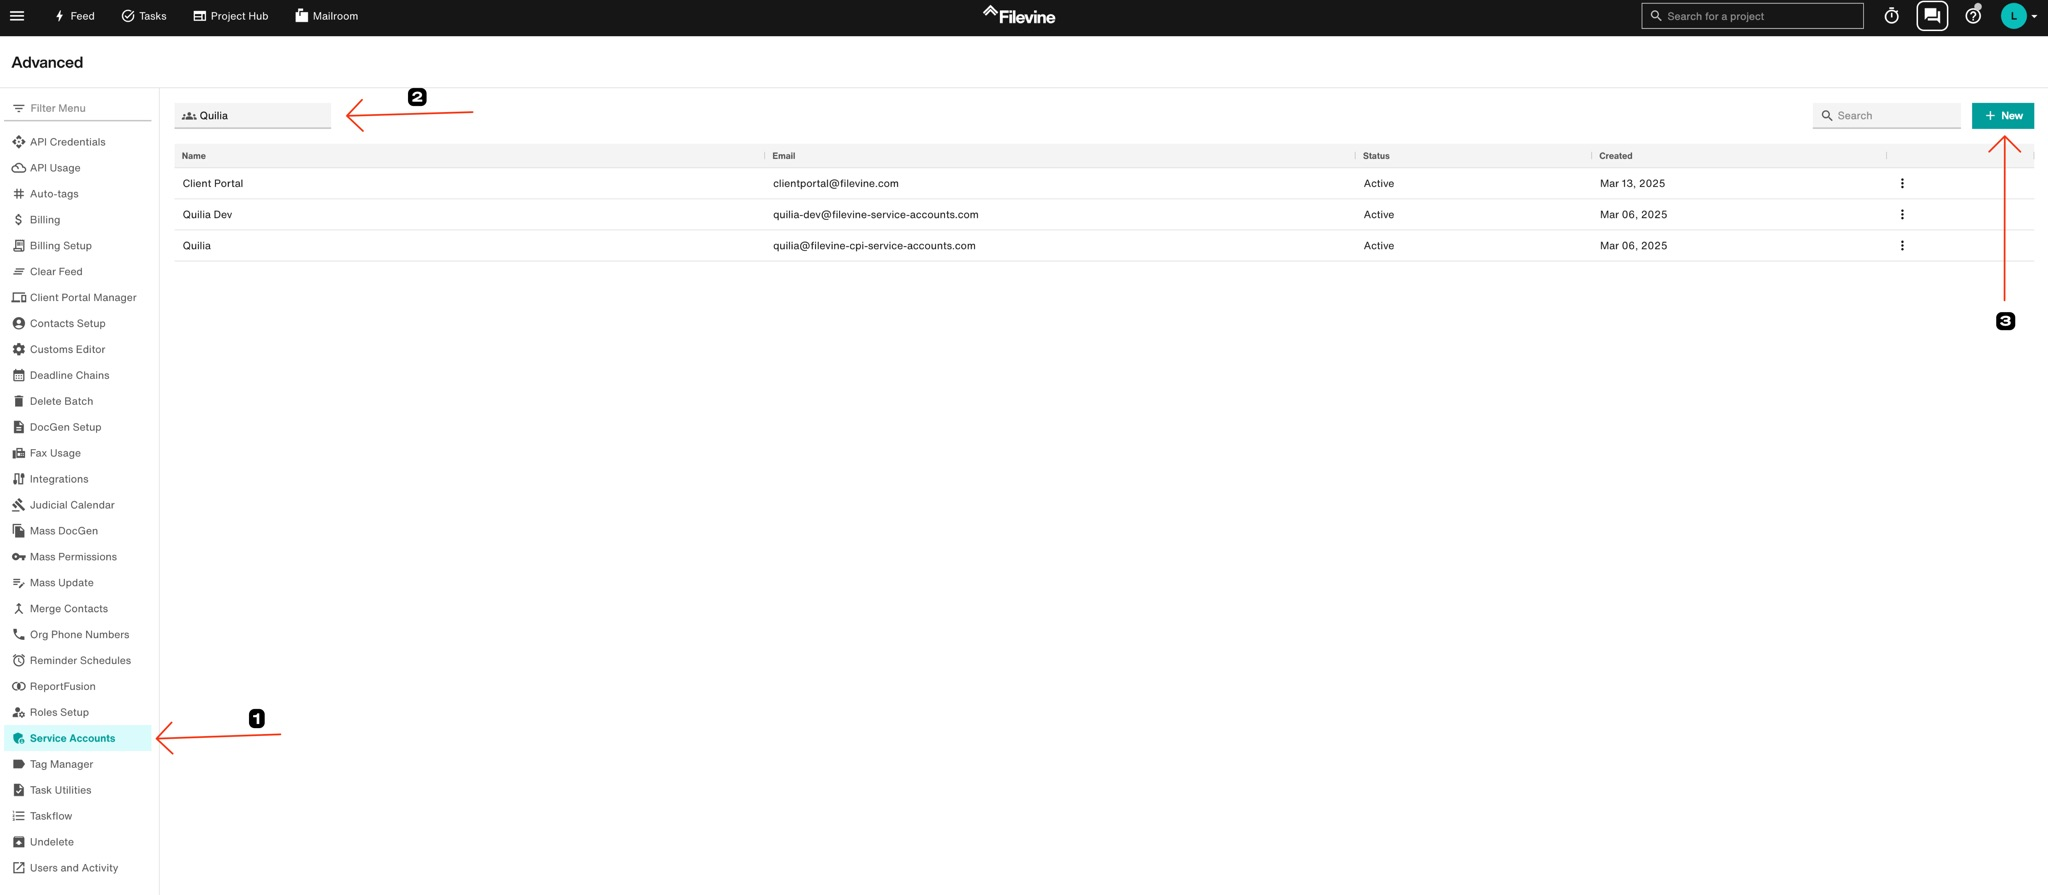
1. Go to Service Accounts.
2. Select your organization.
3. Click + New.
3. Configure the Service Account
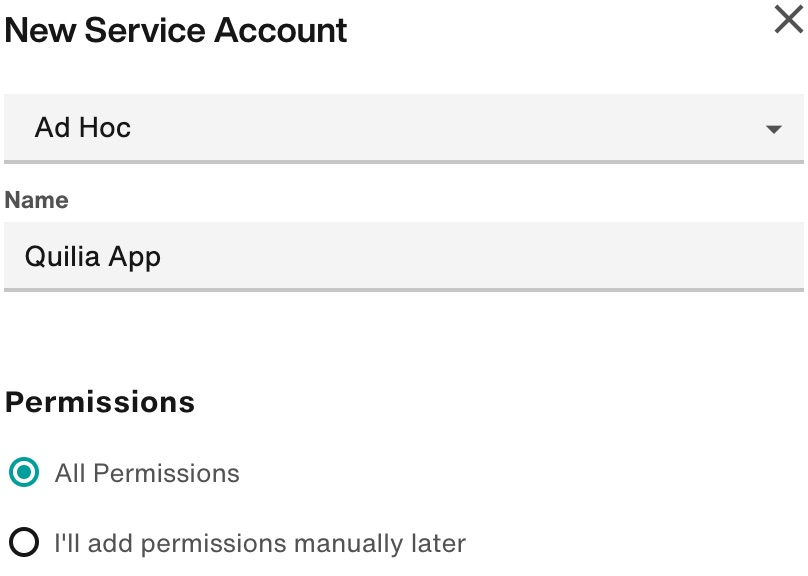
Name the Service Account “Quilia App” so it’s easy to recognize later.
Select All Permissions.
Click Save.
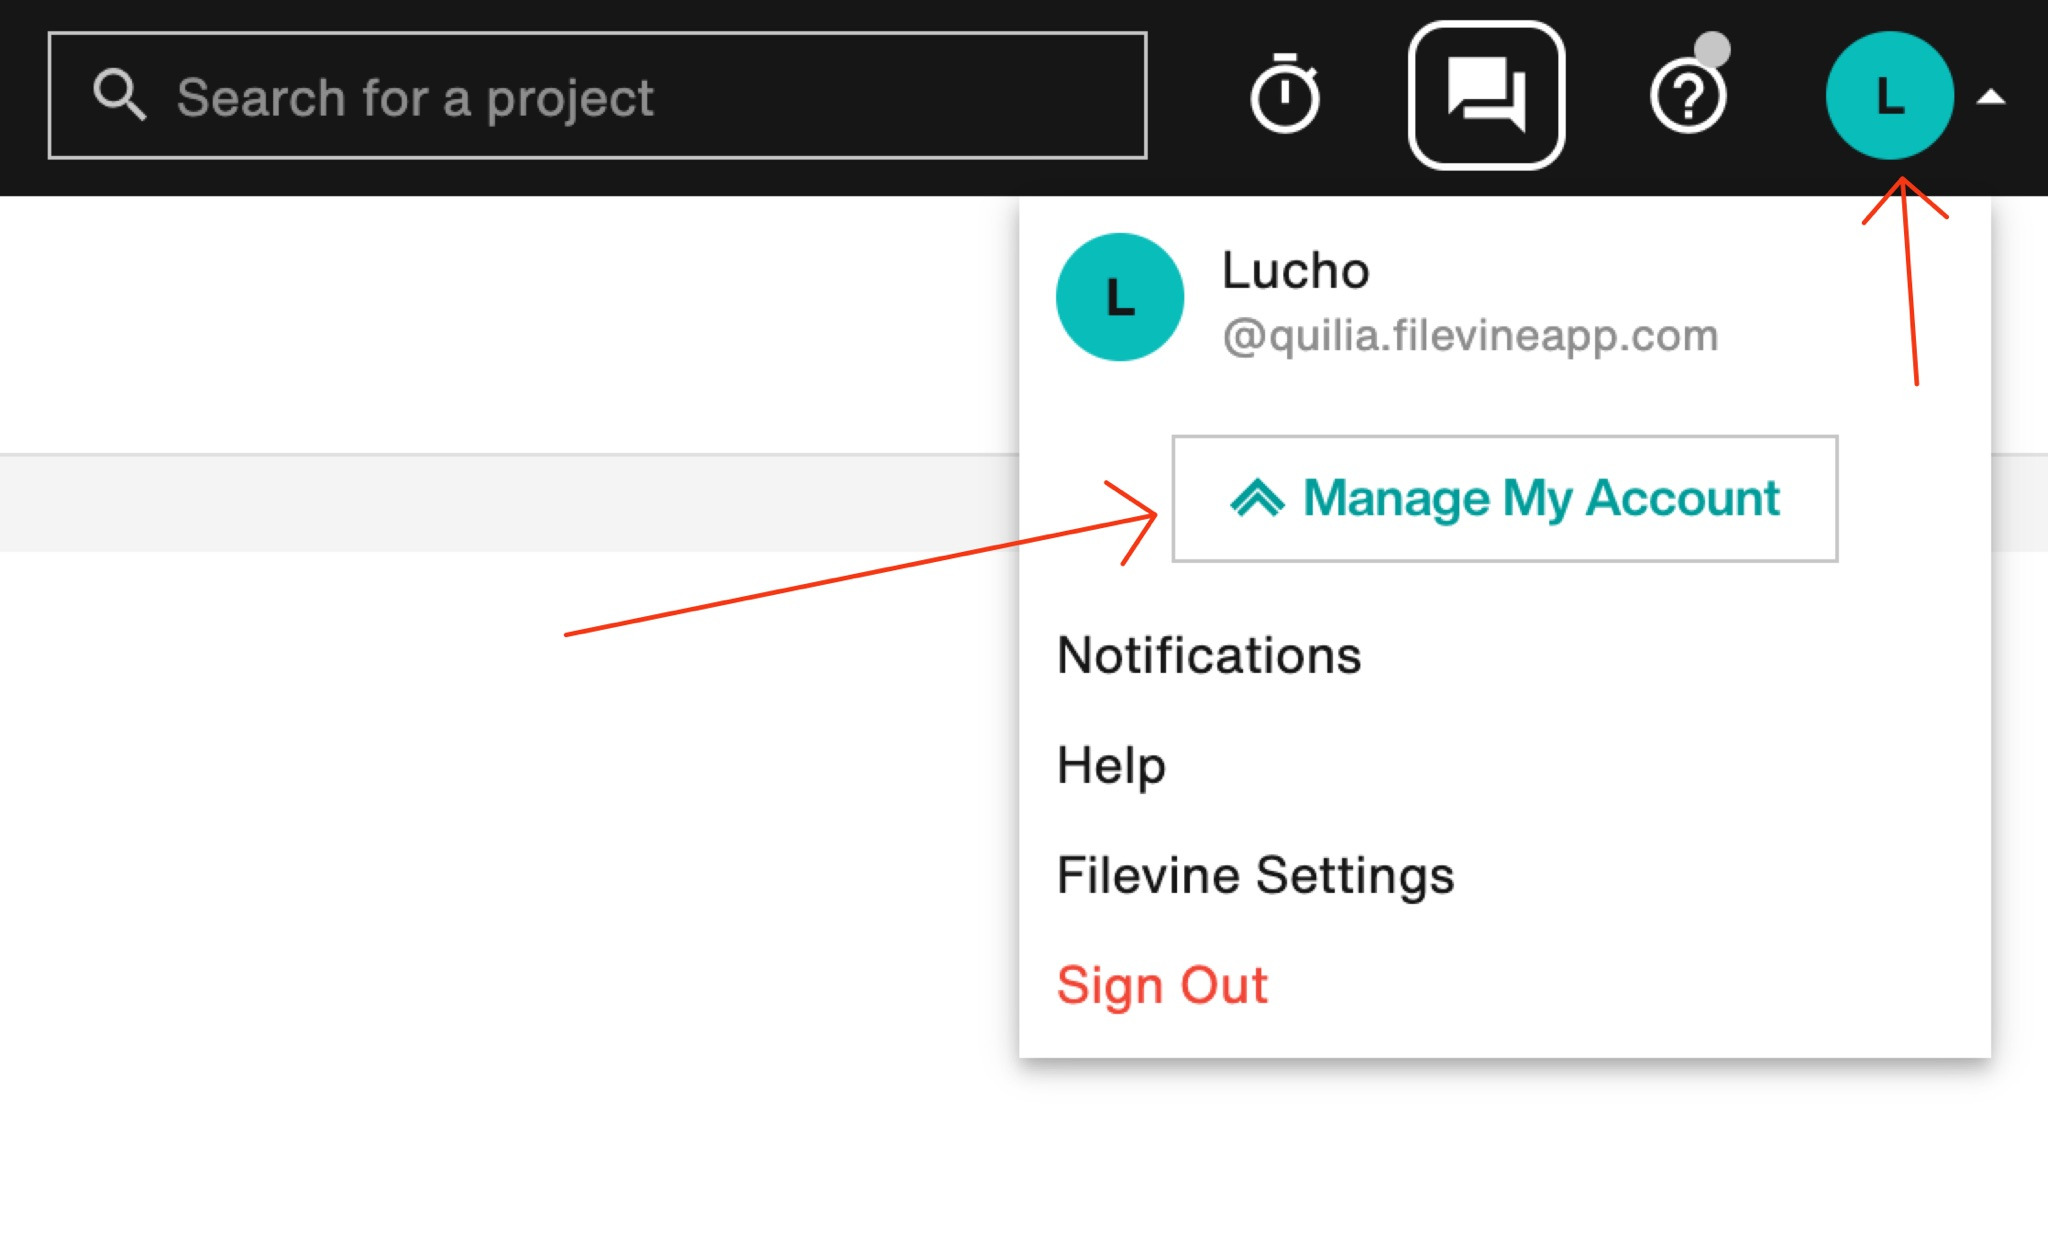
4. Navigate to Manage My Account
Click your avatar or letter icon in the top-right corner.
Select Manage My Account from the menu.
5. Create a New Personal Access Token
In the left menu, click Access Tokens.
Click + New in the top-right corner.

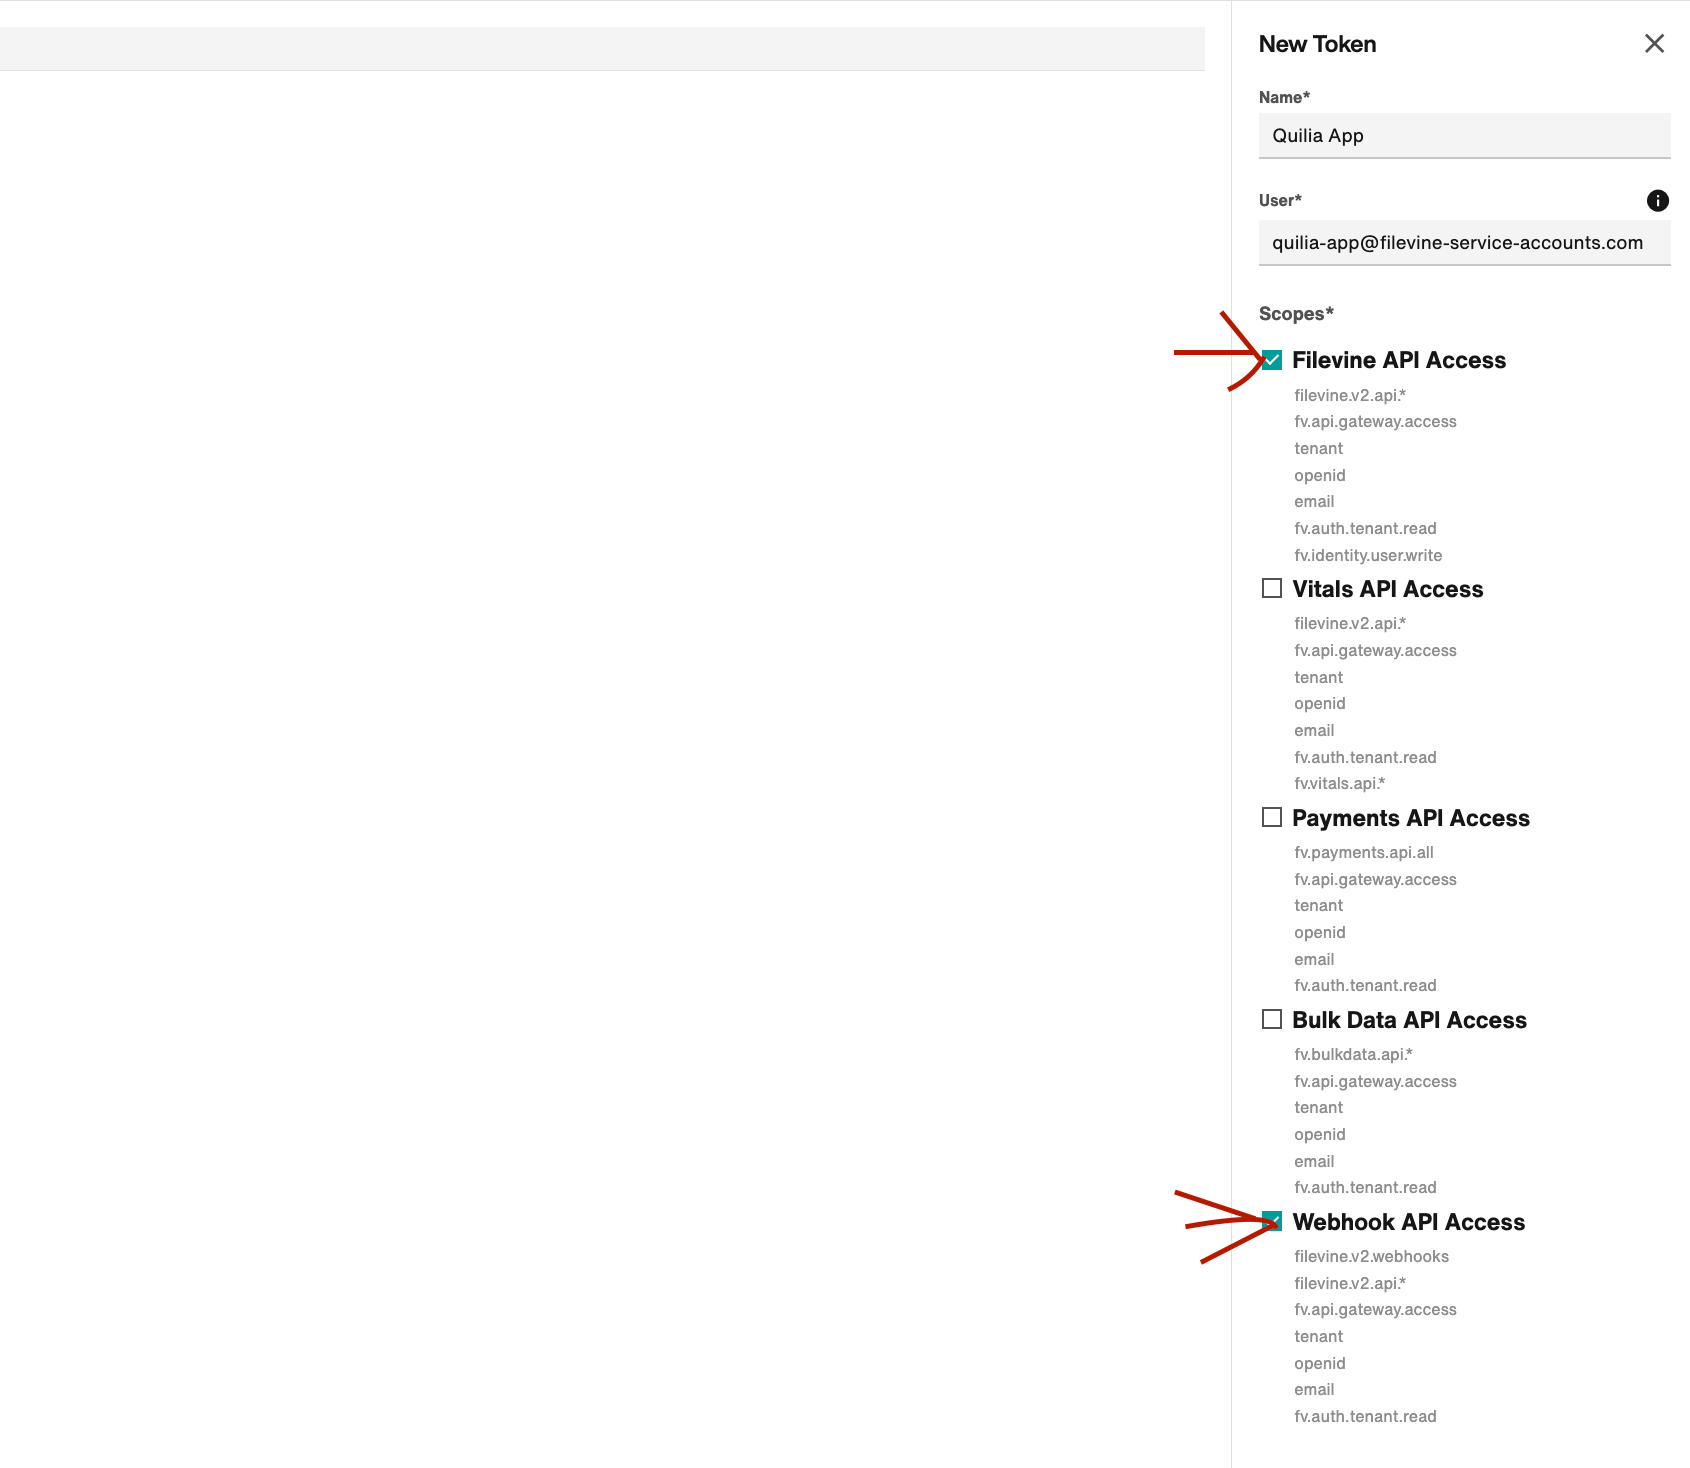
Type Quilia App in the Name field.
Make sure the correct scopes are selected and hit Create at the bottom.
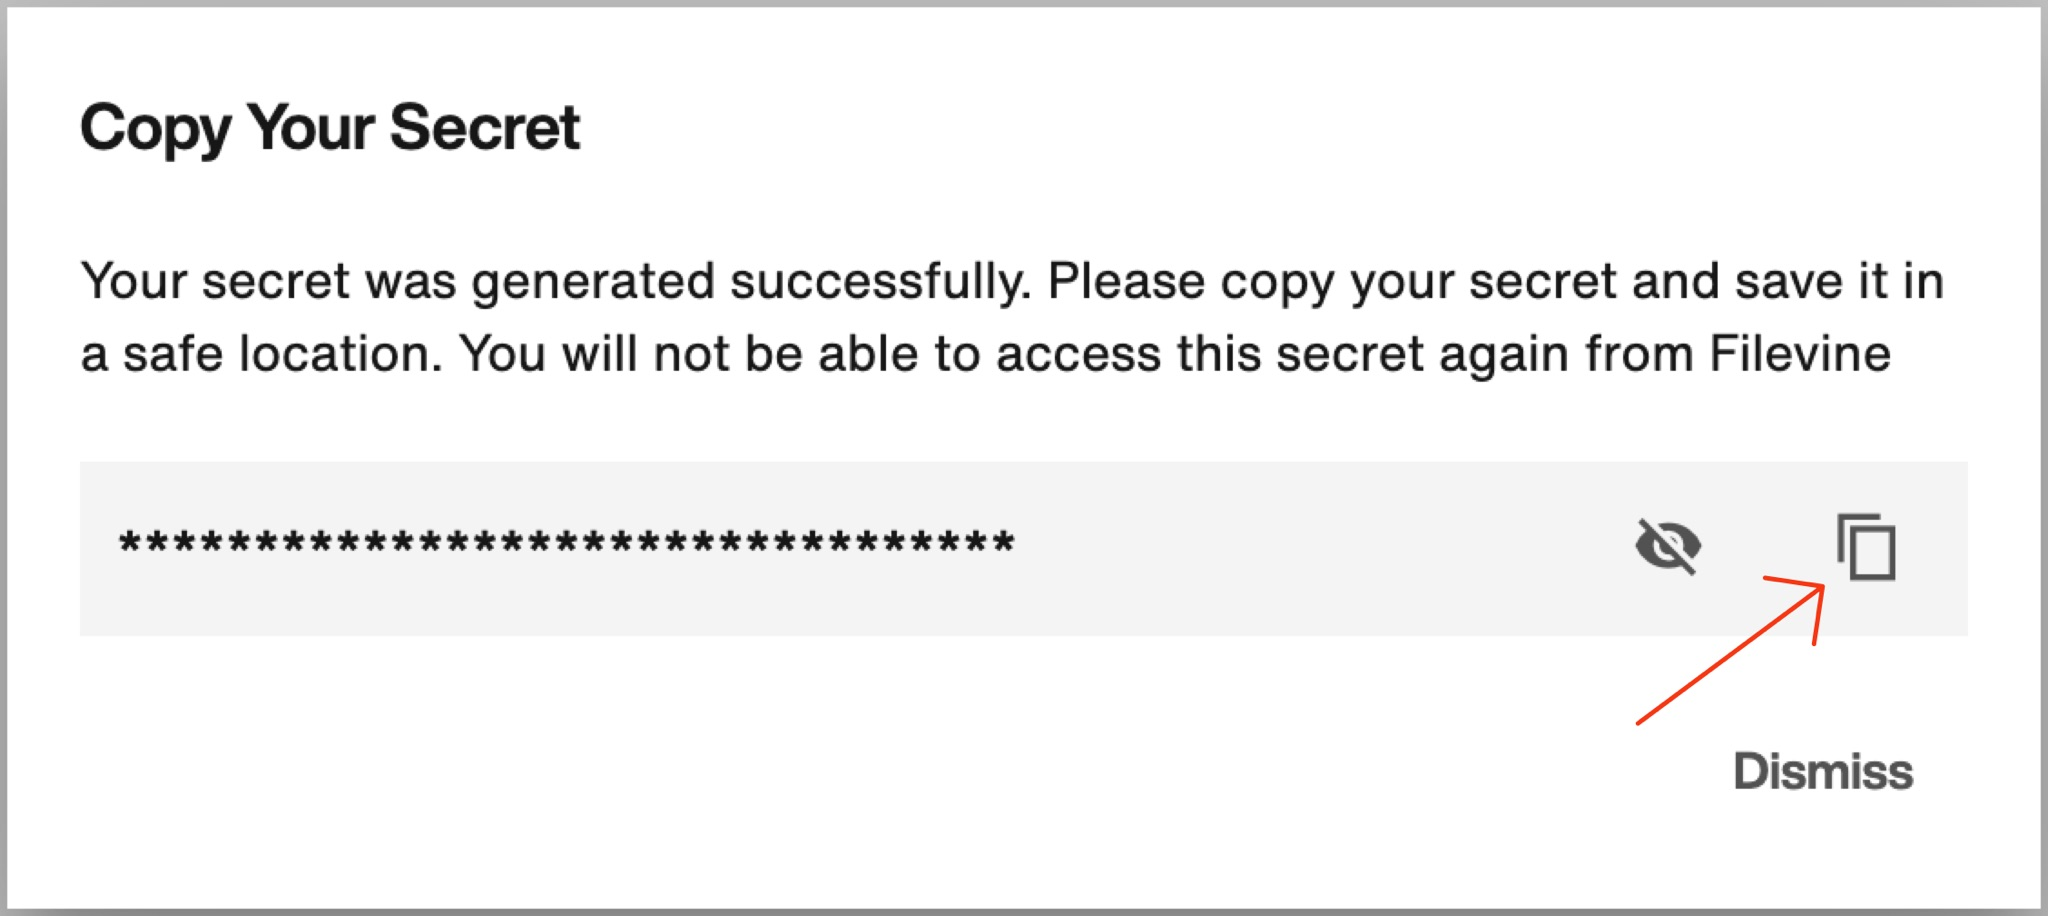
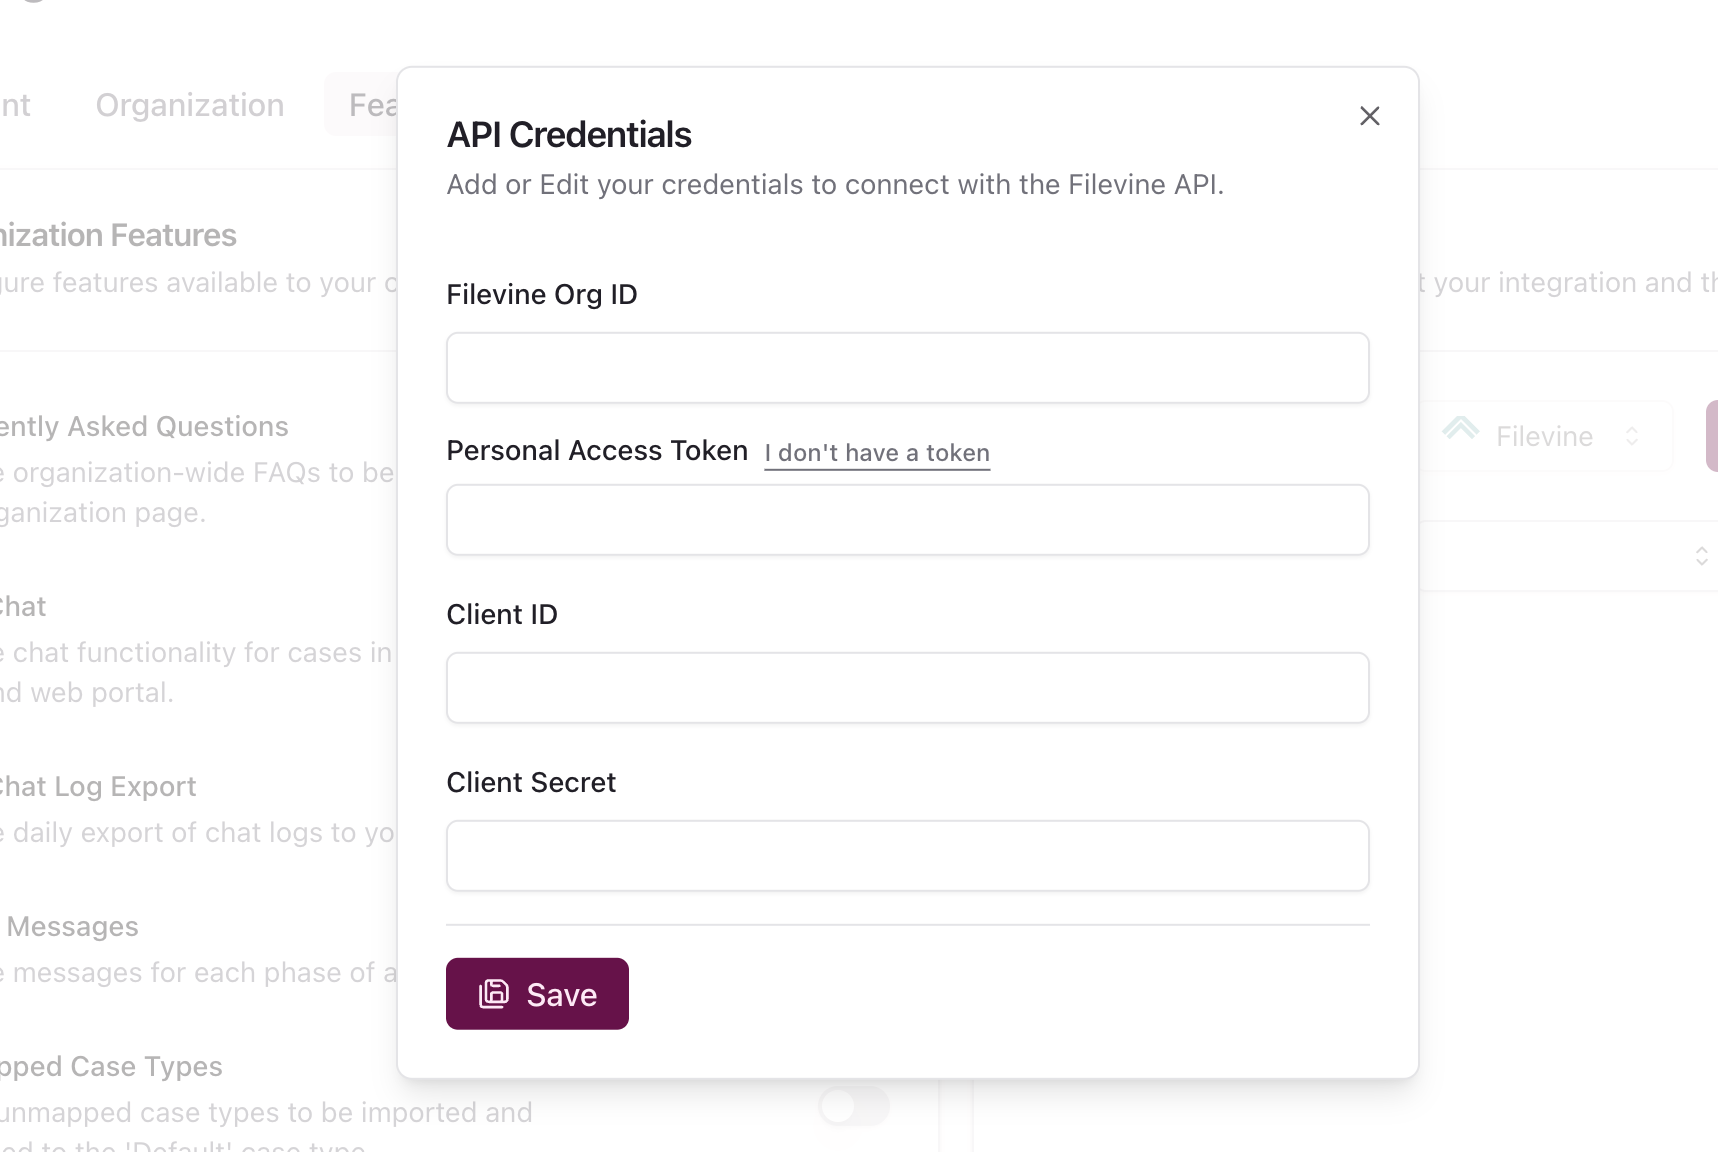
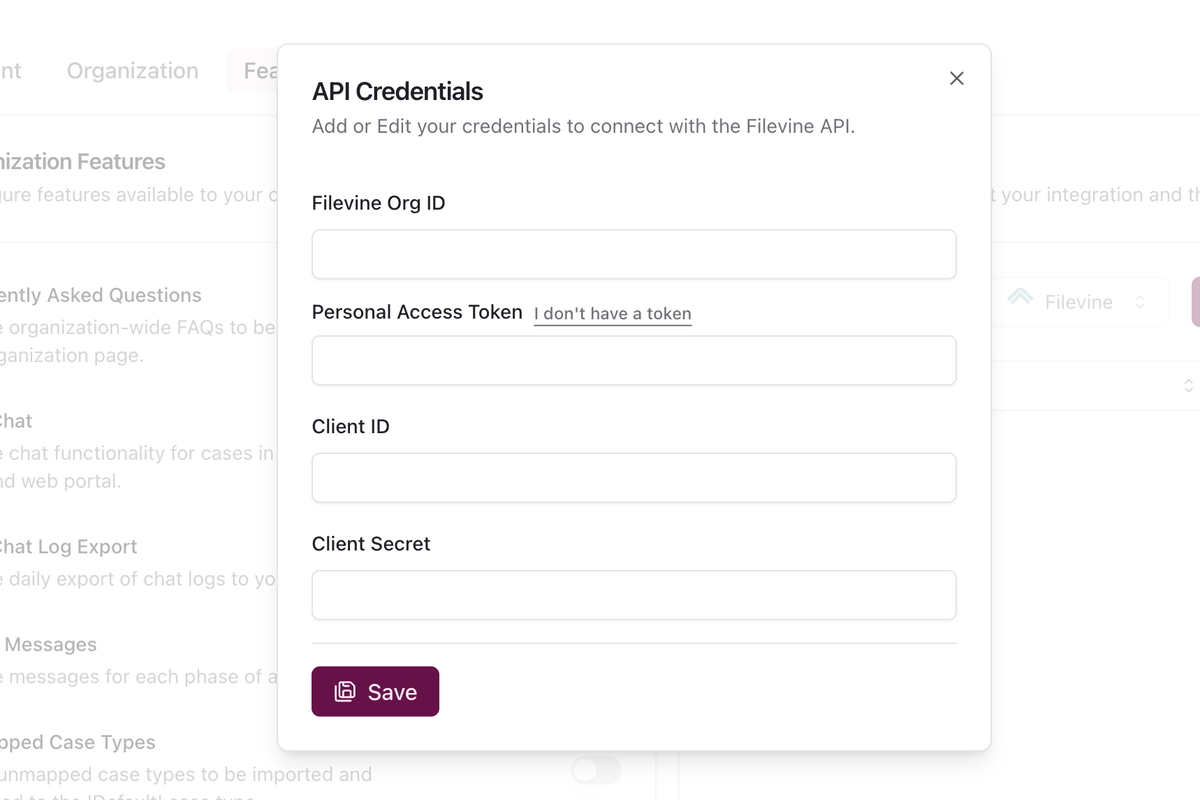
Go the portal and paste the Personal Access Token now.
6. Create a New Client Secret
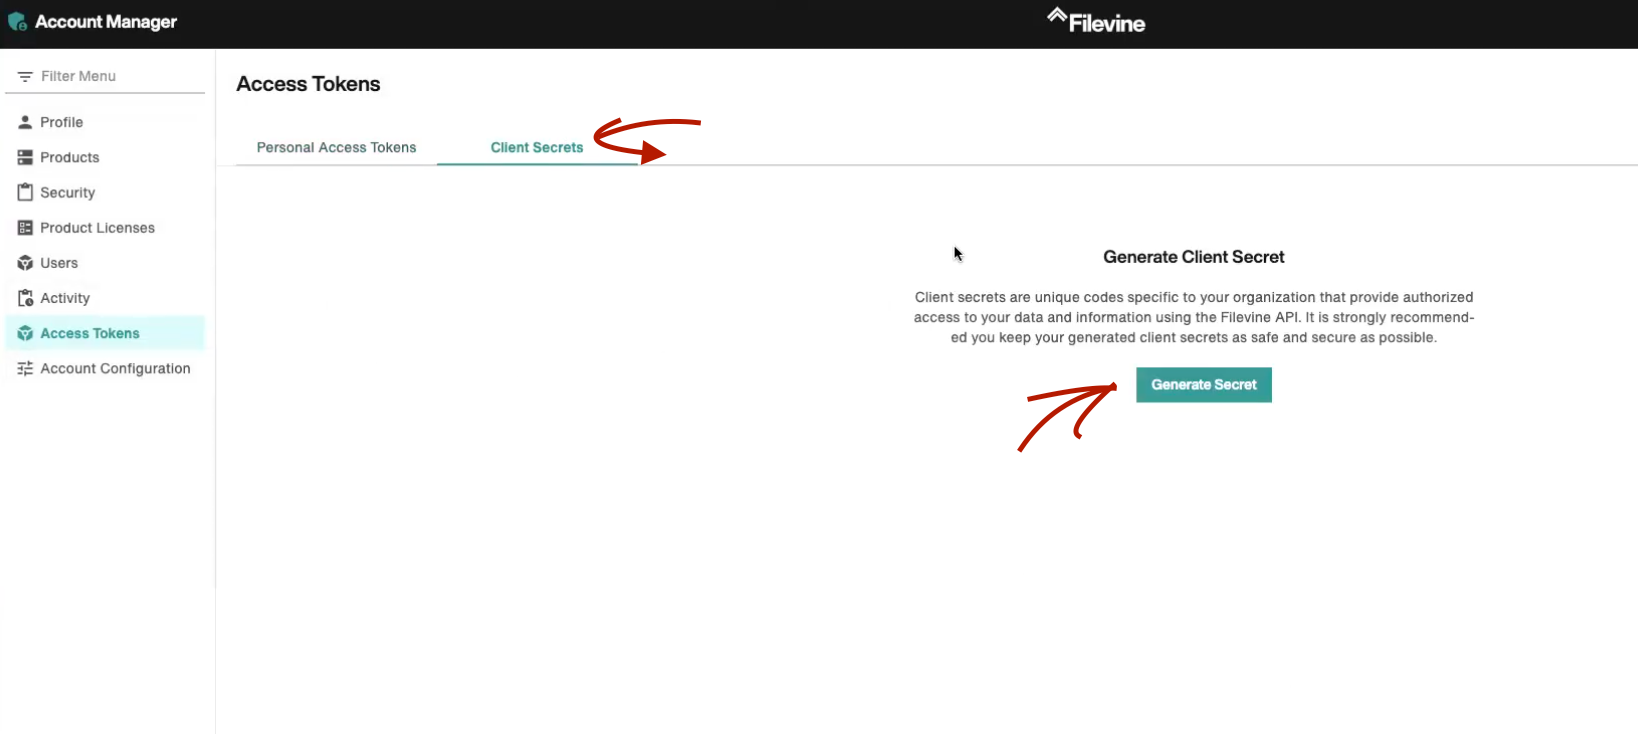
Look for the Generate Secret button after clicking on the Client Secrets tab.
Click it to generate a new secret.
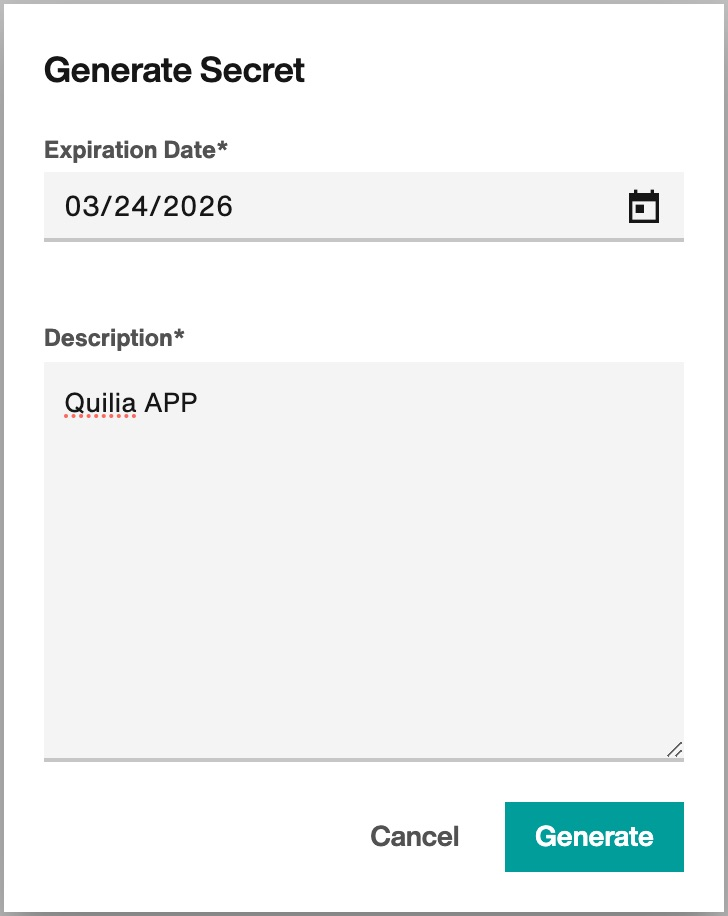
For the Description field, put Quilia App and click Generate.
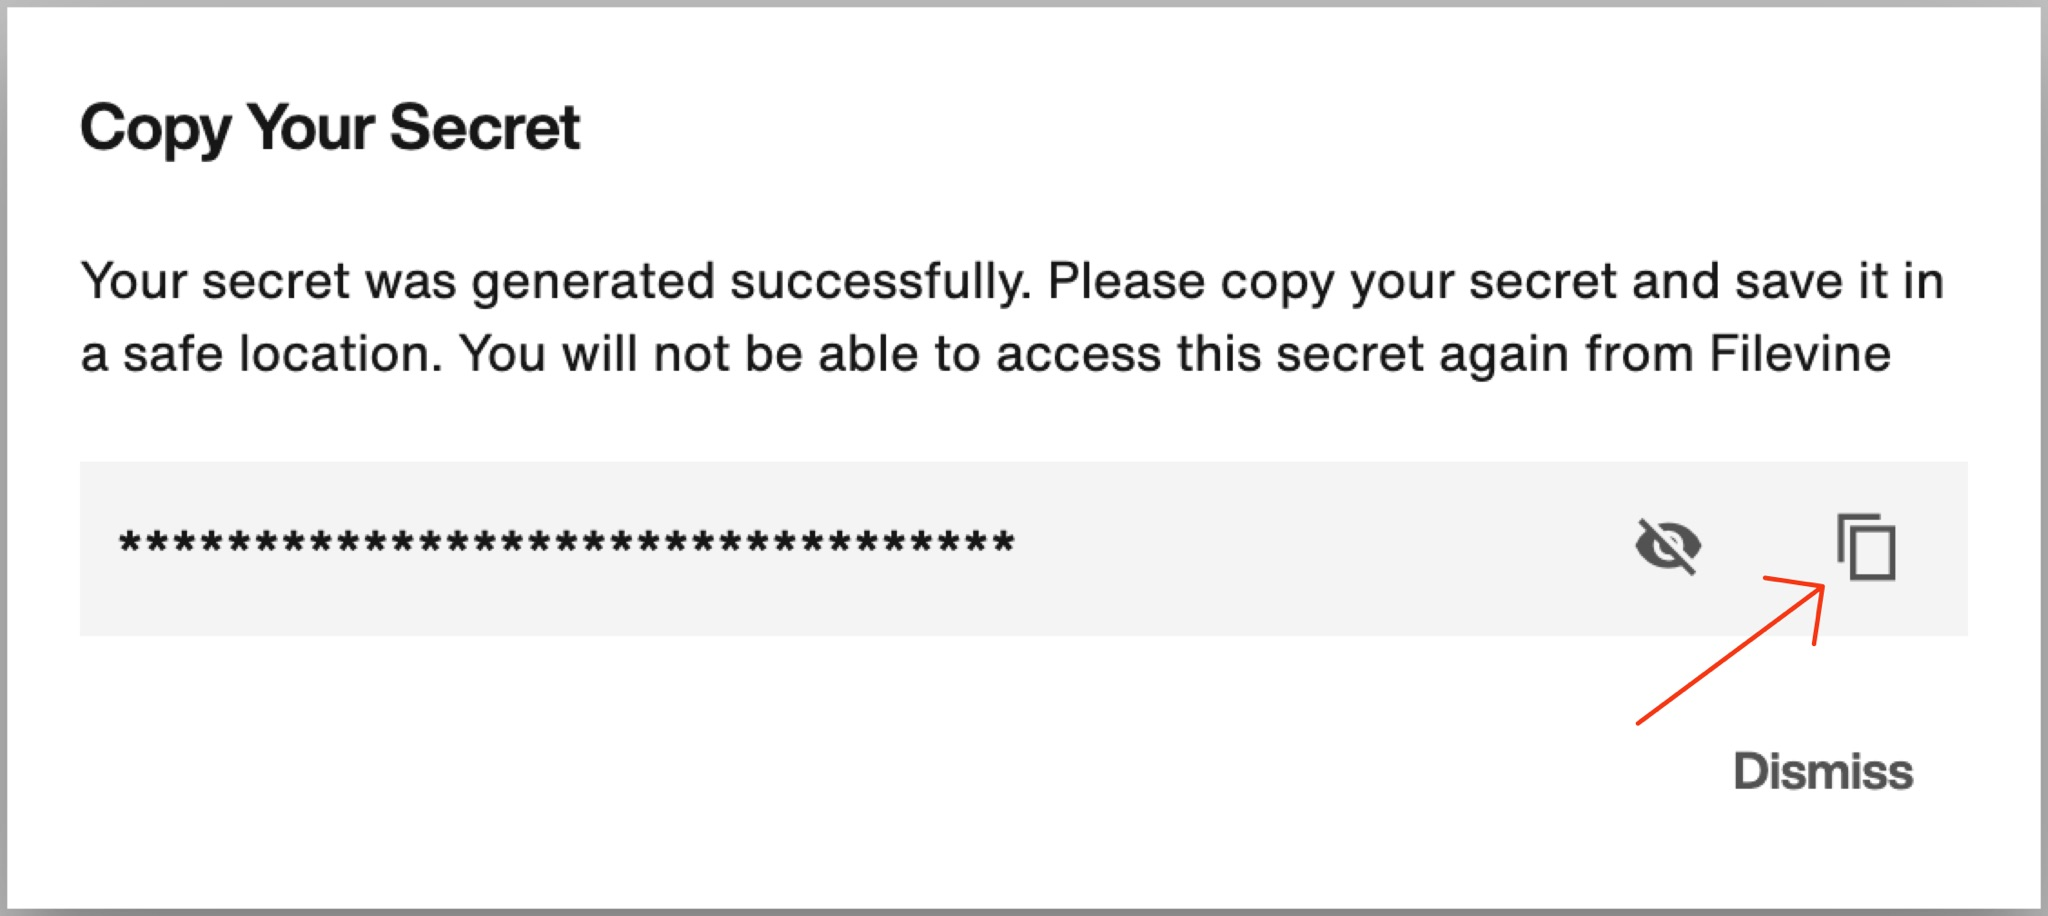
Copy the Secret.
Go to the Portal and paste the Secret.
6. Grab Org ID
Go back to original Filevine tab.
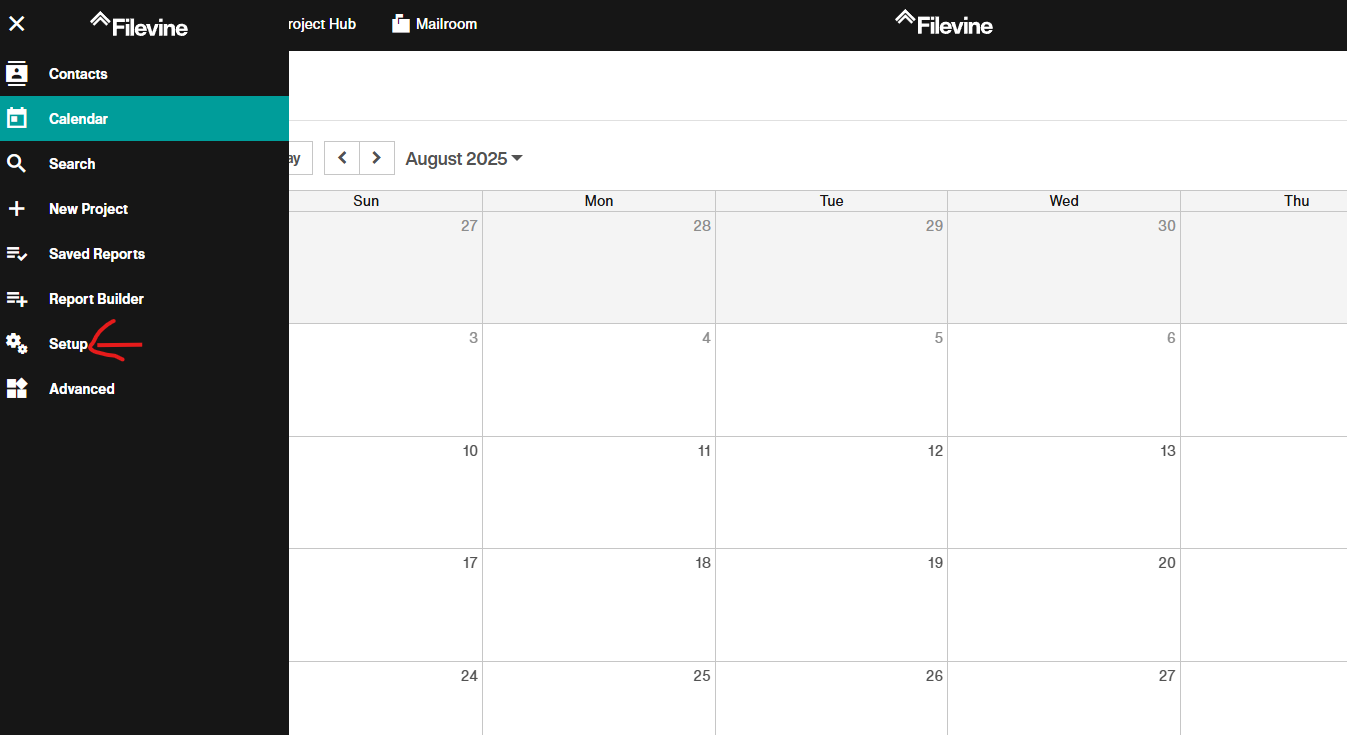
Click the hamburger icon in the top-left corner.
Select Setup.
Select Orgs on the left navigation tab and copy the ID.
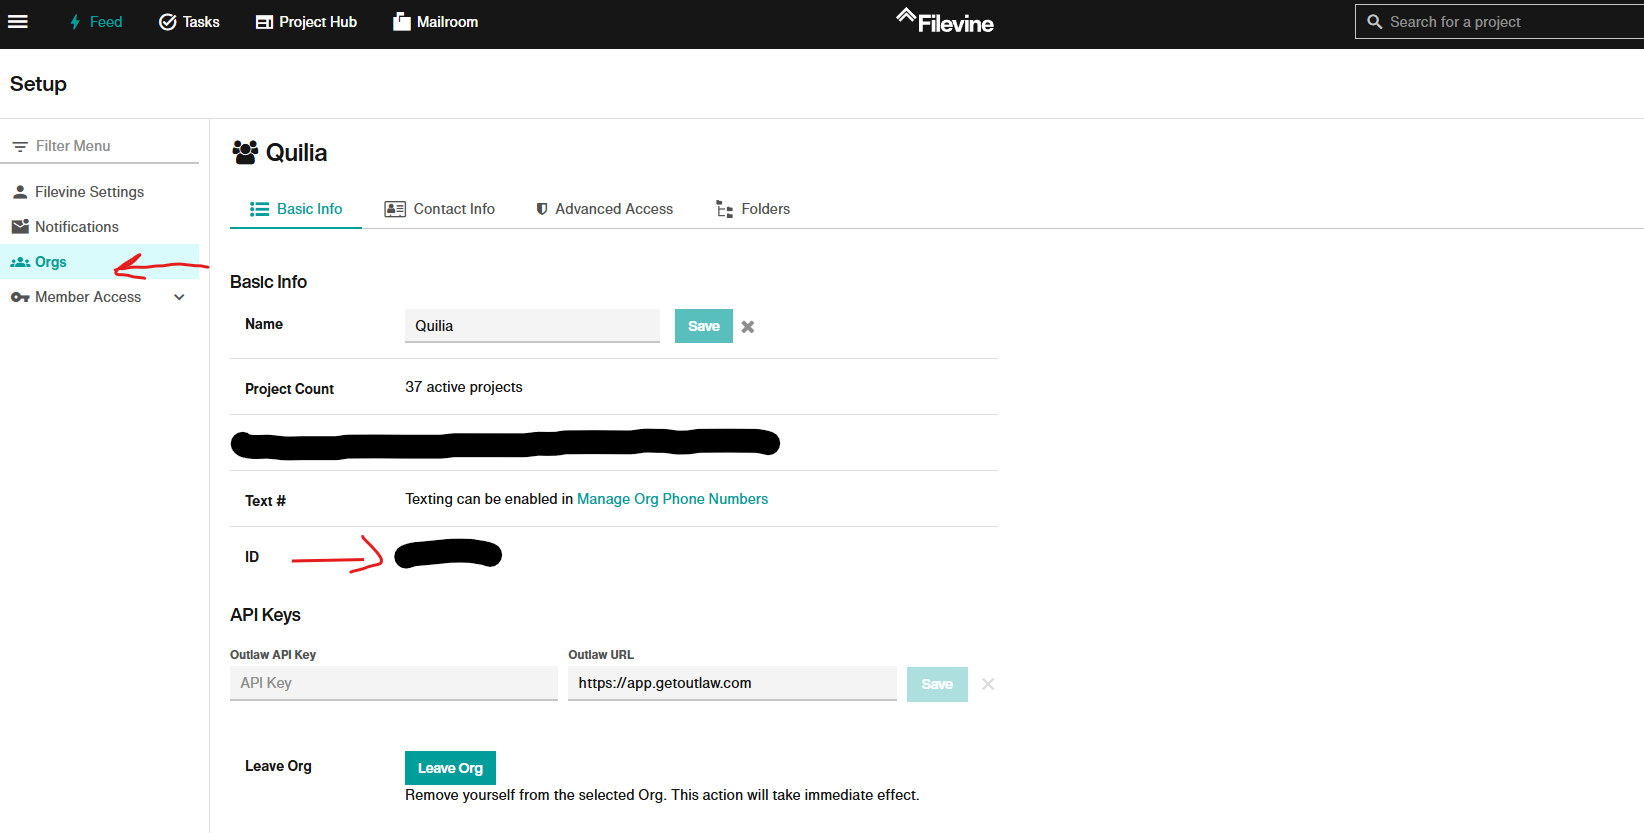
Go to the Portal and paste the Filevine Org ID.

