
How to Add an Appointment to a Client’s Case
Published on September 16, 2025
Video Description
Learn how to quickly add an appointment for a client in Quilia’s portal. In this short walkthrough, we cover navigating to the client’s profile, adding the appointment, setting date/time/provider, and confirming that it shows up on the client’s end.
Tags
Related Videos
 0:33
0:33Adding Your First Client to Quilia
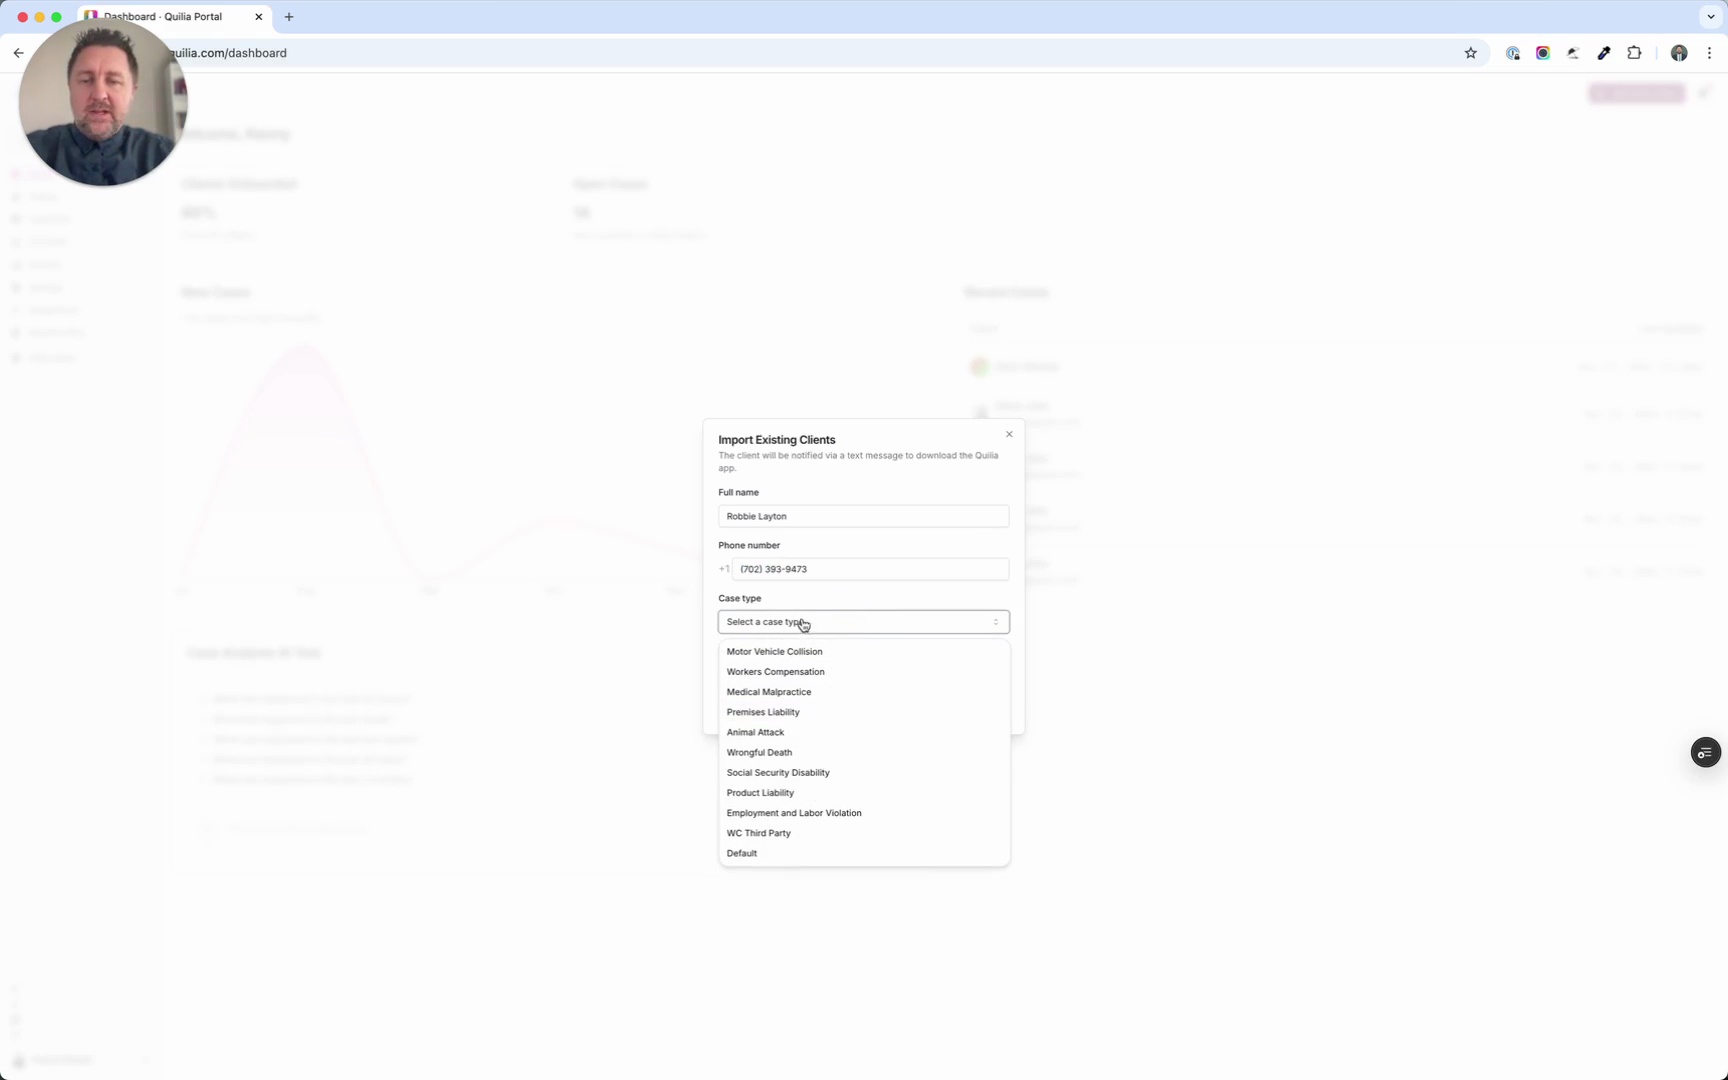
Getting started with Quilia is simple. In this tutorial, you’ll learn how to add your very first client to the platform and send them an invite to download the app. Steps covered in this walkthrough: - Log in and click Add New Client in the top-right corner. - Enter the client’s name, a text-enabled phone number, case type, and preferred language. - Click Add Client to create their profile in Quilia. - To notify them, click Send Download Invite and confirm. That’s it—your client is now set up and ready to participate in their case using Quilia.
case management softwarelaw firm efficiencypersonal injury attorneysclient onboarding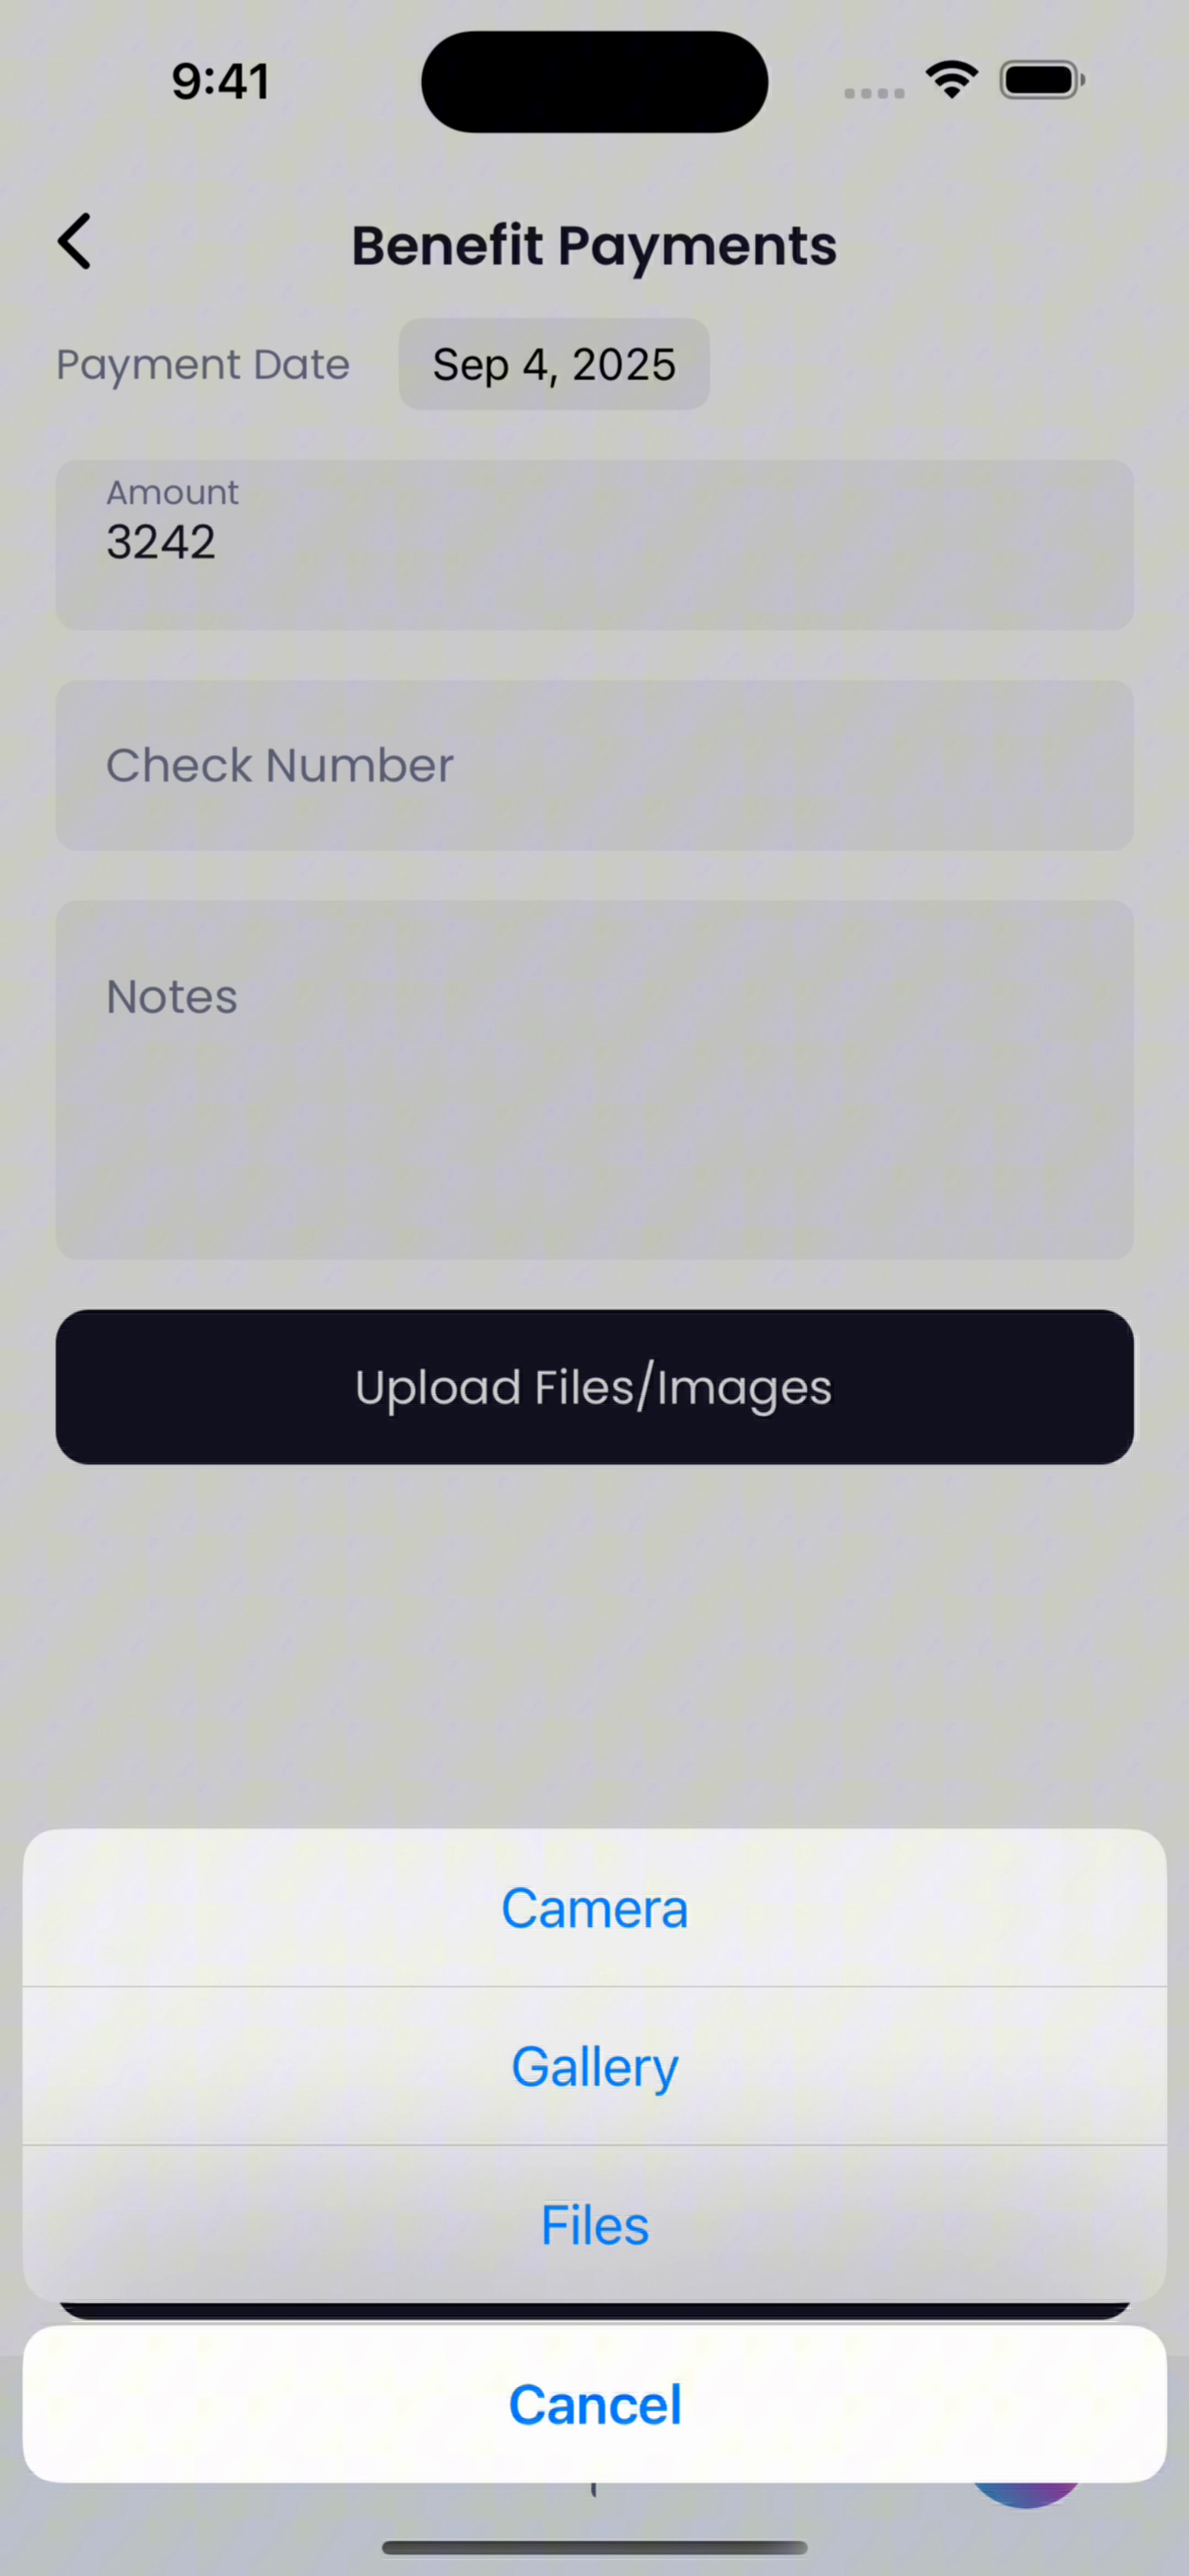 Vertical0:25
How to Upload Benefit Payments in Quilia
Keeping track of your workers’ comp benefit payments in Quilia helps make sure nothing slips through the cracks. By uploading your check amounts (and a photo of each check), your attorney gets a clear record of what you’ve been paid and when. This makes it easier to stay on top of your case, avoid confusion later, and ensure you’re getting every dollar you deserve. Here’s how to do it: Go to the Wages tab. Select Benefit Payments. Enter the amount of the check you received. (Optional) Add the check number and any notes. Tap Upload Files/Images to attach a picture of the check. Click Save to finish. That’s it — your payment is logged, your case file is stronger, and you’ve done your part to keep things moving smoothly.
client onboardingquilia appclient tutorialworkers comp case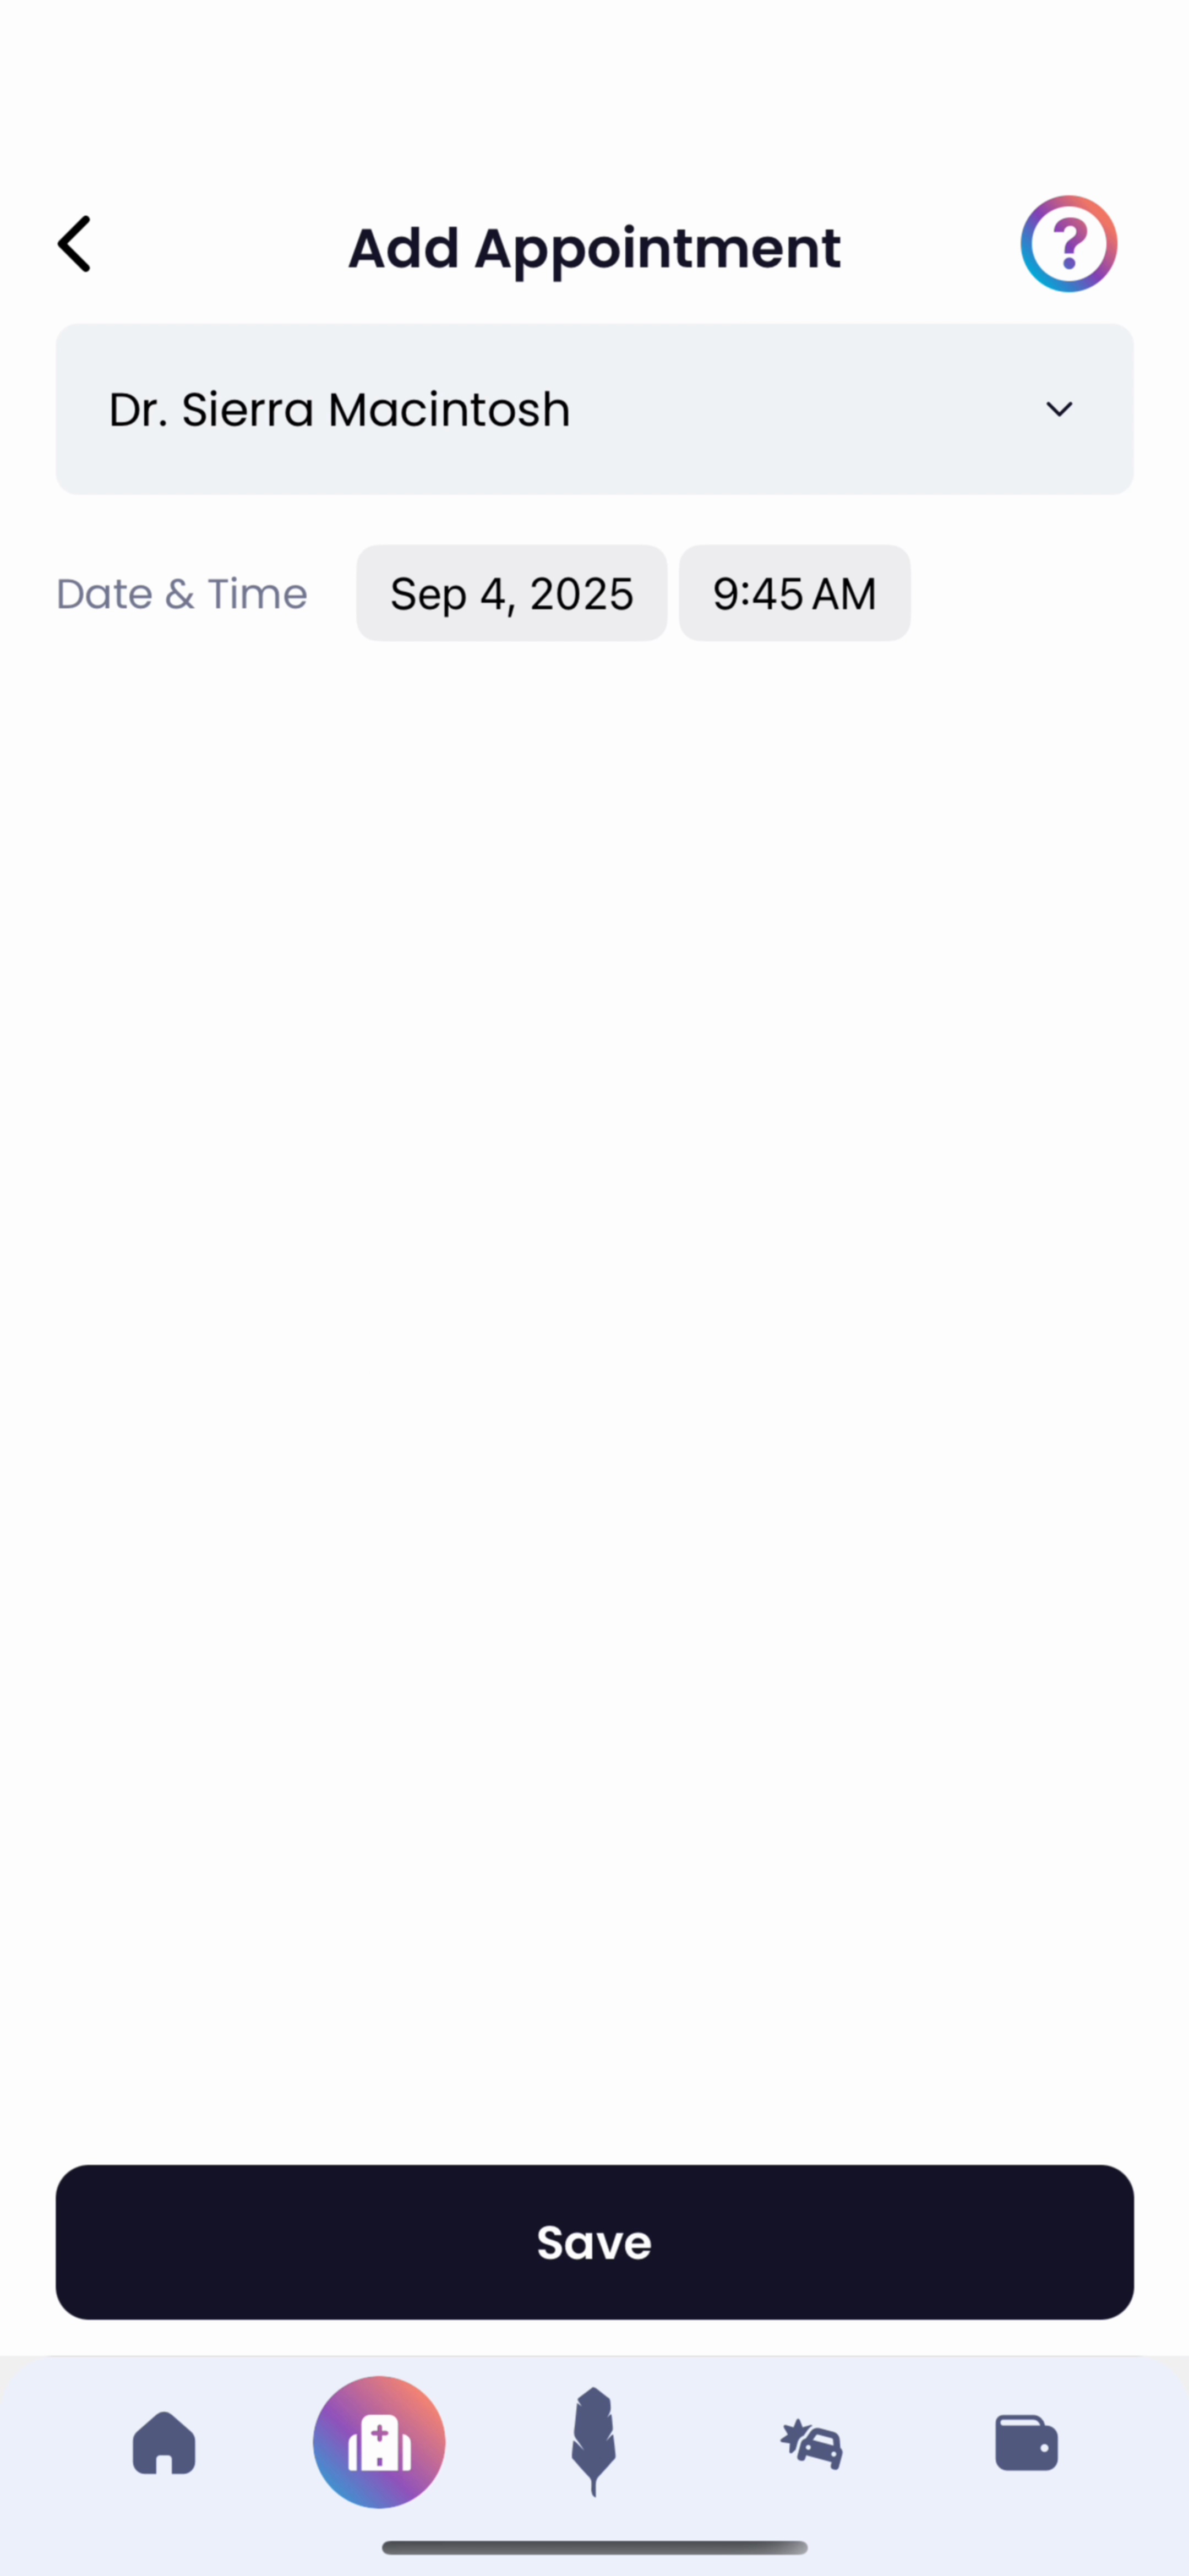 Vertical0:27
How to Add Medical Appointments in Quilia
Adding your medical appointments in Quilia helps you and your attorney stay on the same page about your treatment. By logging appointments and updates, you’re creating a clear record that supports your case, keeps your recovery organized, and makes sure nothing gets missed. Here’s how it works: - Tap Appointments. - Select Add Appointment. - Choose your medical provider from the dropdown. - Set the date and time. - Click Save. - On the confirmation screen, note if you attended, rescheduled, or were released from treatment. - You can also add your next appointment, upload documents, or leave notes right there. - Click Save and Close to finish. With each update, your case file stays accurate, your care timeline is crystal clear, and your attorney has exactly what they need to fight for the best outcome.
quilia appclient tutorialmedical appointmentstrack treatment